Manufacturer
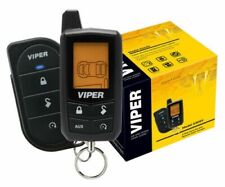
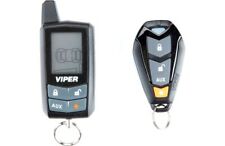
Viper DEI Directed Electronics D.E.I inc. Python
Compatible FCC ID#(s):
EZSDEI7141
Alternate Spellings
EZSDE17141
Interchangeable FCC ID #s:
EZSDEI7141 EZSDEI7i41
EZSDEI7i51 EZSDEI7151
Model #(s)
7141V or 7142V7131 7131V 7131P 7131X 7141 7141V 7141P 7141X 7142 7142V 7142P 7142X 7151 7151V 7151P 7151X
Button Count:
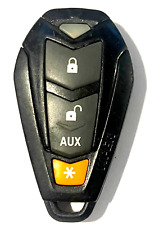
4: Lock Unlock AUX \"*\" / Blue LED Light
Battery (installed):
2: CR2016
Frequency:
433.92 433 - 434 MHz
LED Light Color:
Blue
Condition Notes:
Pre-Owned; ready to be programmed to your vehicle’s compatible RKE aftermarket system >> Remote has chips in the casing, a hole drilled & key ring installed and faded button grpahics.
Compatible Aftermarket Installed Systems:
350Plus, R350, 3105V, 3305V, and 4105V car security systems.
210 HV
211 HV
300 HF
PC 300 HF (ESP)
300+ HF
330 V
350 HV RESPONDER 350
350+
Programming: Please note not all customers will be able to complete the programming on their own so if you are having trouble or unsure diagnostic programming is available at your local qualified automotive locksmith or car/audio shop.
Programming option #1:
1) Door. Open Door.
2) Key. Turn the key to the ON position.
3) Choose. Within 5 seconds press and release the Valet/Program button the number of times corresponding to selected channel listed below.
After you have selected the channel, press the Valet/Program button once more and hold it. The LED flashes the same number of times as the channel selected and the siren (if connected) chirps to confirm the selected channel. DO NOT release the Valet/Program button!
4) Transmit. While holding the Valet/Program button, press the button from the transmitter. The unit chirps (if horn or siren are connected) to confirm that the transmitter has been taught to the receiver.
5) Release. Now that the code is learned, you may release the Valet/Program button and remove the key.
CHANNEL NUMBER FUNCTION
7) ----------------------------------- AUTO-LEARN STANDARD CONFIGURATION
9) ---------------------------------- DELETE ALL TRANSMITTERS
Programming option #2:
1.IGNITION ON: Turn the ignition to the run position or start the engine.
2. ENTER PIN: Enter the factory preset PIN code 2 by pressing (*) on the Valet switch twice, then (gray square) on the Valet switch once.
Note: If the factory preset PIN has been changed, the new PIN must be entered.
3.HOLD/CHIRP/RELEASE: After entering the PIN code, press and Hold (*) on the Valet switch until a chirp is heard & the LED turns on, then release the button. You have now entered the feature selection position of the User Selectable Features grid.
4.COLUMN SELECT: Press (gray square) on the Valet switch the same number of times as the desired column. After a pause, the siren will chirp the same number of times as the selected column for confirmation.
5.FEATURE SELECT: Press (*) on the Valet switch the same number of times as the desired feature. The siren will chirp with each press. The feature can now be changed using the remote transmitter.
6.FEATURE CHANGE: Press (unlock/lock) on the transmitter. If the system chirps once, the feature has just turned off; if the system chirps twice, the feature has just turned on. If the feature has more than two settings, continue pressing (unlock/lock) on the transmitter to toggle through the settings.
You can advance to any feature in the same column by pressing (*) within 60 seconds; to program a feature in a different column, begin at step 4 within 60 seconds.
7.EXIT PROGRAMMING: To exit programming mode, turn the ignition off or wait 60 seconds without pressing the Valet switch. The siren will chirp 3 times to indicate programming mode has been exited.
AUTO-PROGRAM REMOTE:
Auto-learn remote to the system in the standard button configuration. Once you have entered the feature, press (unlock/lock) on the transmitter until you hear a confirmation indicating the new remote is learned.