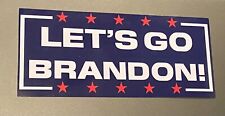
DESCRIPTIONDo you want a Decal for your car? This item will be an excellent choice. This decal is a Let\'s Go Brandon Car Window Decal that is die cut with no background. What you are about to purchase is not made of cheap vinyl it is made of Oracal 651 glossy vinyl. It is waterproof and has sticky adhesive that is made for long-term use. Easy to apply to any clean, dry, and smooth flat surface.Features:- QTY:1- Color:Multiple- Material:Oracal 651 Glossy Vinyl- Size:Multiple- Premium material that is waterproof and sun-proof for durable use. Reflective, cool even at night.- 7 Year Lasting Vinyl- Decorate your car with a personalized car decal, making your car special and attractive.- Easy to paste and remove without hurt to the car paint.- Can be applied on side windows, rear windshield, side, front, or back of the car, etc.Package Including:Let\'s Go Brandon Car Window Decal***MADE IN USA***
If no color is chosen,White will be sent.
All stickers come ready to install with application tape and Instructions to apply !!
A basic simple method for installing the vinyl decals...
Upon receiving your decal in the mail - unroll and layout flat. Lightly squeegee out any wrinkles caused by the shipping process.
APPLICATION INSTRUCTIONS1. Gather simple supplies. For this method you\'ll need tape, rubbing alcohol, scissors, napkins, and a squeegeeor credit card. Clean the surface well with rubbing alcohol.
2. Tape Decal to surface as shown using three pieces of tape as shown. Masking tape works well. Make sure you tape it exactly where you want it because that\'s where it will end up.
3. Peel back side without tape and cut wax paper underneath. You might want a friend to help hold the stick part so it don\'t fall back on the glass.
4. With the wax paper cut off on one side, get ready to apply half of the decal. Preferably using a squeegee or credit card applying from the center outwards to reduce air bubbles.
5. Apply the one side from center outwards.
6. Remove the three pieces of tape now. Lift the other side.
7. Peel off wax paper backing from where you cut with the scissorsand hold the rest of the decal up and get ready to apply like you did the other side.
8. Squeegee the other side on as you did the first side. From the center out to reduce air bubbles.
9. Once the whole decal is applied, very slowly remove the top layer of application tape at a sharp angle from the sticker.
10 . Da Da!! Don\'t That Look Great!
1)Give decal a firm squeegee first. this
enables easy separation from wax
paper. Peel extra slow when decal is
cold.
2)SLIGHTLY heating with a blow dryer
may help is your having difficulty
separating the decal from wax paper.
3)Always clean glass VERY thoroughly with
rubbing alcohol only. NOT WINDEX!
4)Do not apply in temperatures below
50 degrees Fahrenheit. This has to do
with vinyl’s initial adhesion property.
5)Do not let snow stay on decal for
extended periods if possible. Gently
wipe away if you can.
6)In extreme cold weather put vehicle
inside if possible.
7)Don’t pour hot or warm water on
frozen decal. Don’t tamper with decal
when it’s frozen.